
When you finally find the woman that you want to marry, you want her to feel special. So special, that you’ll go about 1,000 miles out of your way and down countless internet rabbit holes, just to create the perfect moment to remember for the rest of your life. In March 2022, I started this crazy journey, and it has been perhaps one of the most gratifying and rewarding feats that I have undertaken thus far.
From the time I was little, I have always loved making things…model airplanes, wooden dinosaurs, leather belts, etc. Thus, it was natural for me to consider making an engagement ring for my girlfriend (now, I am blessed to call that lovely lady my wife). Unlike my other hobbies, however, becoming a jeweler was quite a bit more complex. Before embarking on this journey, I spent hours and hours learning about various subjects, such as gold alloys, lost wax casting, heat treating ovens/kilns, and other related topics. When I felt that my levels of enthusiasm were at their peak, I decided to jump in head-first and start buying the materials I needed to complete this project. Otherwise, doubt would slowly creep up on me, and I knew that I might never start if I didn’t have some skin in the game.
Despite my gung-ho attitude, it still took a little time for me to start this process. After all, I had no equipment to cast gold. See this post on how I made a burnout oven for the lost wax casting process. After building and acquiring all of the equipment necessary to cast gold, I started to learn how to carve and model wax.

After approximately 60 hours of trial and error, I finally honed my wax carving skills enough to achieve the result shown in the picture above. I have always had artistic inclinations, but they were usually in the realm of music, not sculpting. Wax carving was very challenging and tedious for me.
Intelligently, I used a scrap wax ring model and scrap copper wire as a trial run for my new casting setup. This setup included my fancy custom-built kiln, a vacuum chamber (from Amazon), and a cheap spring-loaded centrifuge (used for dental castings). It worked! Unintelligently, however, I didn’t follow the same steps on try #2 exactly as I had done them the first time, leading to disaster and having to start back a step 0 with a new wax model. When I started over, I decided to document the whole process on video.
Here is a brief overview of the steps to making a ring (accompanied with video timestamps):
1.) Carve a wax model [0:00]
- The wax model needs to be fairly similar to the expected final product. This not only saves time when fine-tuning the gold product, but it also mitigates wasted material.
2.) Weigh the wax model [1:33]
3.) Calculate the amount of gold needed
- Multiply the weight of the wax model by the specific gravity of the gold alloy (specific gravity of 14K yellow gold is approximately 13). Add 10% to get the total weight of 14K gold needed.
4.) Sprue the wax model and attach a rubber base [1:35]
- Spruing is the process of creating channels for molten metal to flow through during the casting process. Spruing is both an art and a science, as an improper sprue will lead to the mold cavity not being properly filled upon casting. The rubber base provides a smooth surface that funnels the molten metal into the mold cavity, and it also holds the metal flask to contain the investment (similar to plaster) while in the mold curing process.
5.) Measure the amount of water and investment needed to fill the flask [2:19]
- This is a critical step, as imprecise measurements can lead to a poor mold. It is also very time critical, as once the water and investment mix, there is only a short duration of time (about 8 minutes or so, depending on the brand and type of investment used) before the mold sets.
6.) Mix the water and investment and pour over the flask with the wax model [2:27]
7.) Remove air bubbles from the flask [2:30]
- This can be done with a vibrating plate and vacuum chamber. This must be done within the 8 minute time frame of mixing the water and investment. My first model was lost due to my failure to abide by this time frame.
8.) Let flask sit for 90-120 minutes to harden
9.) Remove the rubber base and put the flask in the burnout oven [2:40]
- A burnout cycle takes many hours (mine took at least 17 hours). First, the oven ramps up to about 300°F to remove moisture in the flask. If the moisture is not properly removed, the flask may explode. Next, the oven ramps to about 700°F to melt the wax. The wax flows down the sprue channels, so it is critical to orient the flask in the oven with the sprued opening facing down. This leaves an empty cavity, which is the mold cavity. After that, the oven ramps up one more time to 1350°F, vaporizing any last residues of wax and finishing the curing process for the investment. Lastly, the oven ramps down to the casting temperature. This temperature is critical because it can change the quality of the final cast, and it affects the grain size of the metal when it cools. There does not seem to be any perfect rule, but 1050°F seemed to work for my gold alloy. Note: later on, I did a sterling silver casting and finished out with an 800°F flask temperature. The metal-to-be-cast and alloy composition determines this casting temperature.
10.) Weigh and measure the precise quantity of each metal in the alloy [3:00]
- After extensive research, I decided to go with a 14K gold alloy, meaning that 14/24 (58.5%) of the final alloy is pure (24K) gold. As for the rest, 31.25% was copper, 5.25% was zinc, and 5% was silver. Many gold alloys use nickel, but I did not want to use nickel, as about 10% of the population has a nickel allergy.
11.) Remove the flask from the burnout oven and immediately place in centrifuge for casting
12.) Melt the gold alloy in the centrifuge and release the centrifuge [3:16]
- It is essential to get the molten gold alloy to the correct temperature, and heat must be applied to the gold up to the moment that the centrifuge is released. The gold starts to swirl when it is ready to be cast. I added borax powder during this process to help remove impurities.
13.) Quench the flask [3:30]
- After the gold stops glowing, the flask is quenched (meaning dunked in water). This shocks the hot investment, causing it to break up immediately. What is left, at the bottom of a murky bucket, is a 14K gold casting!
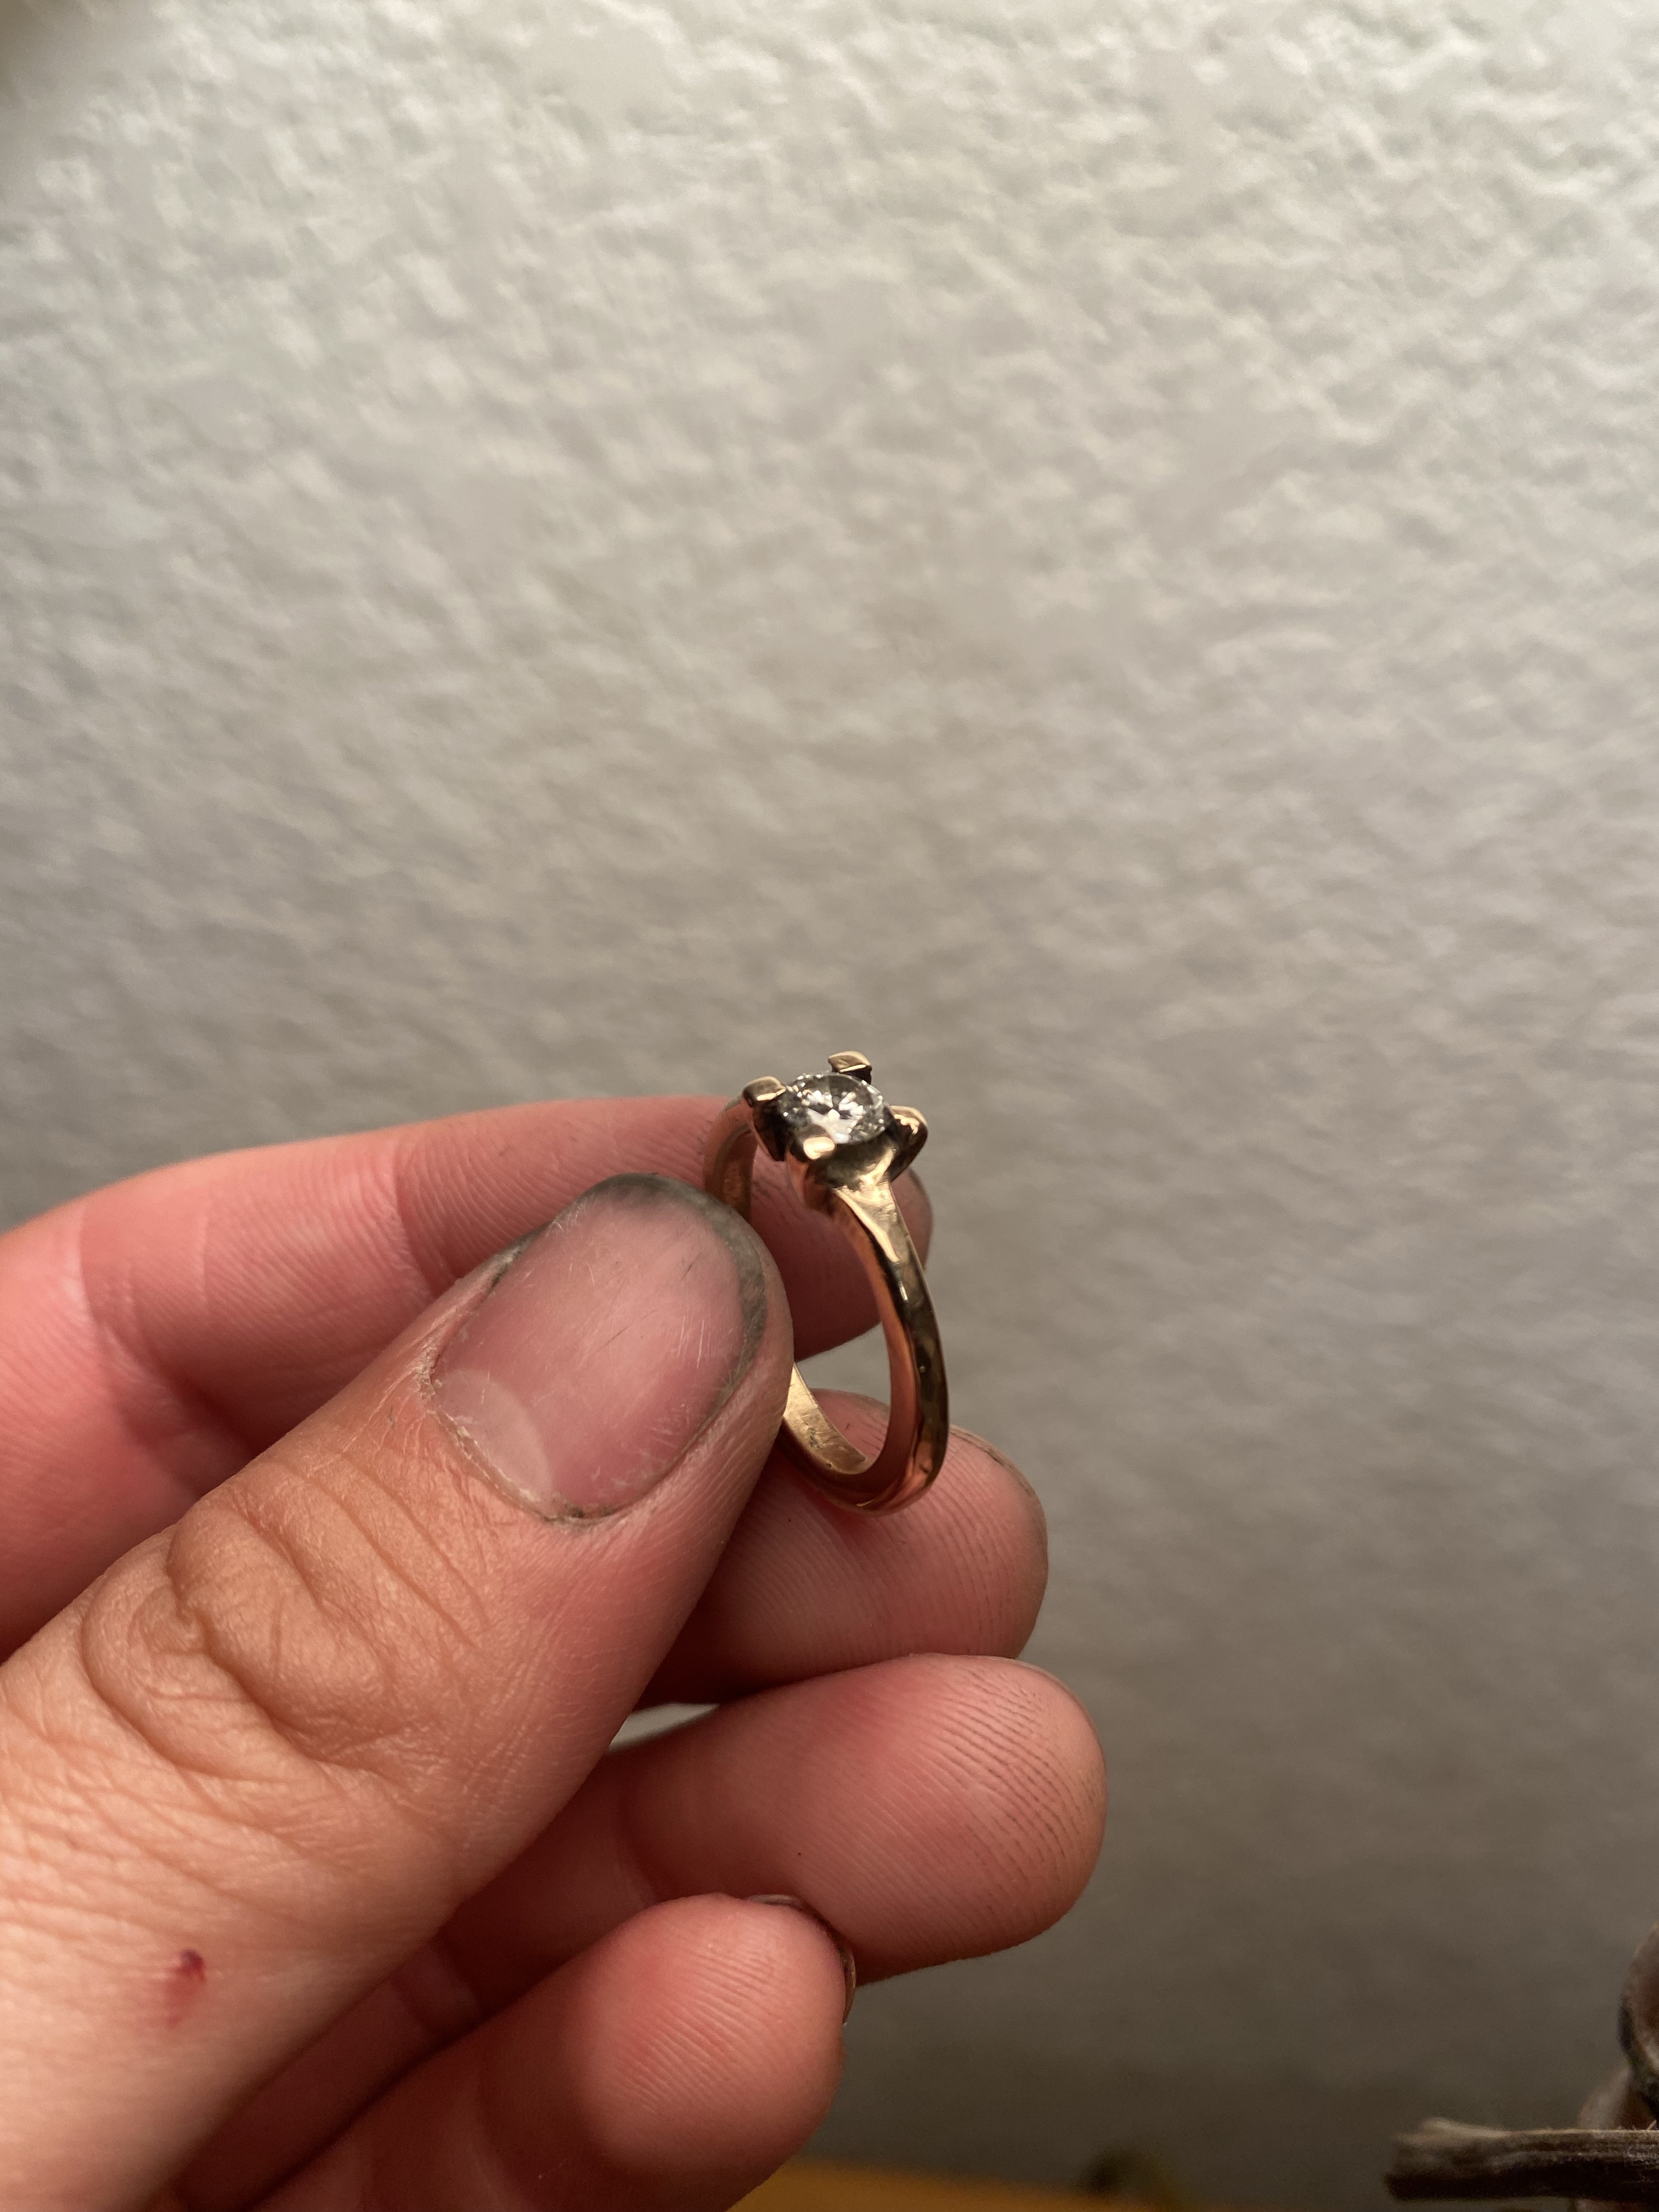
14.) Clean, file, and polish the casting! [3:45]
- I am no jeweler, but I have learned a thing or two from watching some YouTube videos…this part is more art than science. I have never set a diamond in a ring before, but because my wax model was very accurate and precise, the gold casting held the diamond very well, and I was able to set the diamond in the prongs. This part was the most satisfying, as all of my hard work and studying finally paid off!